How to Mount iPad as Disk on Mac?
As you know, it can be an easy thing to sync files from Mac to iPad or back up the entire iPad to Mac with iTunes. But once you want to copy some specific files from iPad to Mac as well as duplicate files from a normal USB disk, it has never been an easy task even using iTunes. This is because of the various limitations given by Apple.
To break the restriction which unables us to create a new file folder on iOS device or copy any files between iDevice and Mac freely as we do on most portable devices, we can give a try to iStonsoft iPad/iPhone/iPod Disk Mode for Mac. This software is a specially designed program which can be used to mount iPad, iPhone, iPod as disk on Mac for easy management of the iOS device. With this software, you can rightly use your iPad/iPhone/iPod as well as a common USB disk for file storage.
In the following user guide, we will describe the detail operations on all available functions of this professional iPad/iPhone/iPod Disk Mode for Mac software. Just go ahead to check the details now!
User Guide: Mount iPad/iPhone/iPod touch as USB Disk on Mac
Preparation: Get the software downloaded and installed on your Mac. Followed by connecting your iPad, iPhone or iPod touch to the Mac computer with USB cable.
![]()
Note: Before we start, you need to install and run iTunes on your Mac. Otherwise, this program can't check your iOS devices exactly.
Step 1: Double click on the desktop icon of the software to launch it. Once your connected iPad/iPhone/iPod have been correctly checked, you will see the screen as below shown. (Here we just take iPad as an example.)
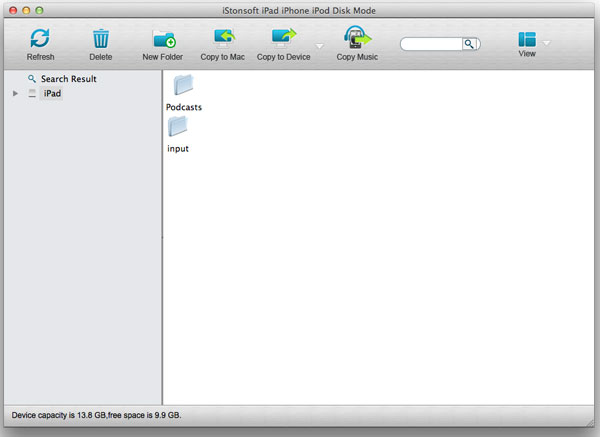
Step 2: Click on proper icons from the above toolbar to manage your iOS device according to your needs.
- Refresh iPad/iPhone/iPod information: If your iOS device is not recognized by the software successfully, you can click on "Refresh" to get the exact device information.
- Create a folder on iDevice directly: You can press the "New Folder" button to create a new folder on the main interface, and then you can right click the new folder and choose "Rename" to set your own folder name as you like.
- Delete file folder from iDevice instantly: For an unnecessary file or folder, you can select it and then click on "Delete" button to remove it.
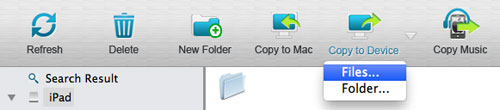
- Copy files between iOS device and Mac quickly: You can click "Copy to Mac" or "Copy to Device" according to your needs to transfer any exact files quickly.
Tips: Once you have lost of music files want to transfer to your Mac, you can simply click on the provided quick button "Copy Music" to get the task in an easy way.
After the program completed all your target tasks, you can then disconnect your iPad from the Mac.
Ok, that's all about how to mount iPad/iPhone/iPod as disk on Mac using the Mac iStonsoft iPad/iPhone/iPod Disk Mode program. So, if you once try to use your iOS device as an ordinary USB disk/flash driver on a Mac, then you can have a shot at this useful software now. It would be your good assistant to use iPad, iPhone or iPod touch as USB disk on Mac.
![]() Free download iPad/iPhone/iPod Disk Mode for Mac OS X
Free download iPad/iPhone/iPod Disk Mode for Mac OS X
More articles you may be interested in:
How to Transfer Kindle Books from Mac to iPad, How to Transfer Movies/Videos from iPad to Mac