How to Convert PDF to JPG on Mac OS X Mountain Lion?
PDF is one of the most popular format nowadays. However, to read or view PDF files, you require an external application like Adobe Acrobat Reader. To handle PDF documents, you need an external application or plug-in which may or may not be present.
In comparison to PDF, image formats do a better job. Firstly, you don't have to install an extra application to open image files. Secondly, browsers have the built-in capability to display images. Thirdly, to cite an example, a PowerPoint presentation with an embedded image goes faster than with a PDF document.
Considering so many aspects, many people want to convert PDF to image format such as JPG. In this tutorial, you can know how to convert PDF to JPG Mac with PDF to Image Converter for Mac step by step.
![]()
Step-by-step Guide: Convert PDF to JPG Mac
Step 1: Import PDF files
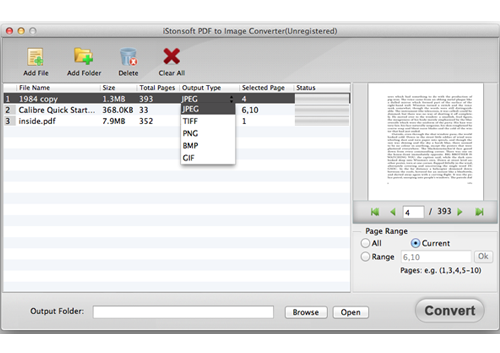
Launch PDF to Image Converter for Mac. Then add your PDF files to the software. There are 3 ways to import PDF files:
1) Directly drag and drop them to the window.
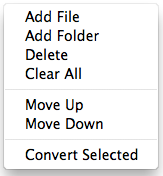
2) Click "Add File" button to browse and add your PDF files.
3) In menu, click File > Add File(s)...
After loading PDF files, you can see PDF files displayed in the file list as below:
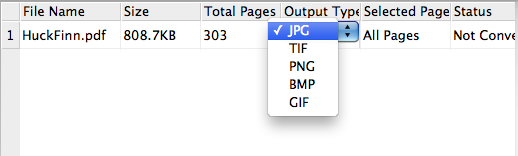
Step 2: Select output format
The default output format is JPG. If the Output Type is not JPG, click to select in the drop-down menu.
Step 3: Page Range settings (optional)
The software provides 3 modes of Page Range: All(Default), Current, Range.
If you Select "All", then all of the pages will be converted.
If you Select "Current", only the current page which you are previewing will be converted.
If you Select "Range", then you will be asked to enter page numbers and/or page ranges separated by commas, for example, 1,3,4,5-10, press "Enter" button on your keyboard to confirm, then the page ranges will be converted.
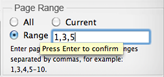
Furthermore, you can also select page(s) or page range in the file list. In the "Selected Page" list, the default is All Pages, click on "All Pages", then you can type your needed page range in the box. After inputting, press Enter button on your keyboard to confirm.
Step 4: Begin conversion
Set output folder: The default is to save output file(s) in "Users/apple/Desktop/output". If you wanna change it, click the button "Browse" to browse and locate the folder which you want.
Click ![]() button to convert all the PDF files in the list.
button to convert all the PDF files in the list.
You can also right-click on the PDF file so as to convert the selected files by choosing "Convert Selected" in the list.
After the conversion finished, you can click the "Open" button to view the result.
Sounds easy? So don't hesitate, this is definitely the best way to convert PDF to JPG Mac!
![]()
Related Links: How to Convert Kindle Books to Nook Tablet, How to Combine PDF Files on Mac